Google Analytics 4 (GA4) is coming whether we like it not. From July 1, 2023 Universal Analytics (UA) will stop processing new data and measurement will have to be done through GA4. Because GA4 uses a different measurement system for defining users and sessions, a new tracking tag will need to be installed in order to begin measuring. However, for the purpose of this How To, we’ll be using Google Tag Manager (GTM) to setup GA4. If you haven’t already, you’ll need to setup GTM and your GA4 property.
Step 1. Navigate to the correct GTM account, select tags, from the left side menu and then click New. This will open a new area within GTM where you can setup the tag. 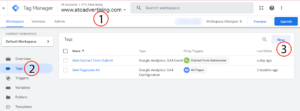
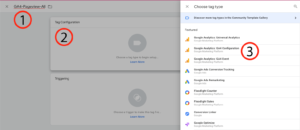
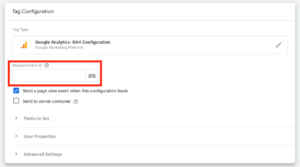
Step 2. Name the tag something relevant, in this case we named it, “GA4-Pageview-All.” Next, click the “Tag Configuration” box which will open a list of tag options. Select “Google Analytics: GA4 Configuration.”
Step 3. You’ll need to tell Tag Manager where to send the data to, which is where the measurement ID comes in. There are a couple of ways to set this up and for this guide, we’ll be setting up a custom variable so you can easily set the measurement ID for any future tags without leaving Tag manager.
Step 3a. Click the icon that looks like a lego brick with the + in the middle of it.
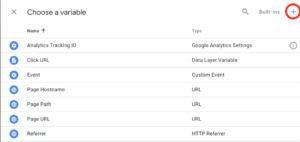
Step 3b. Click the + in the top right corner, which will open a new box to configure the variable. Name the variable something relevant, in this case we named it “Constant-GA4.”
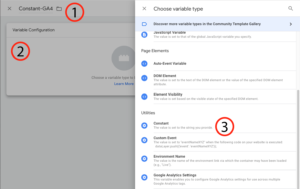
Then click the “Variable Configuration” box which will open a list of variable options. Scroll down the list until you find “Constant.”
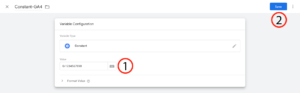
Step 3c. In the value box, enter the measurement ID of the site you want to track. If you need to know where to find it, you can follow this guide here!
Once you’ve entered the measurement ID, click “Save.”
Step 4. Set the measurement ID to {{Constant-GA4}} or whatever you named it, just be sure to contain it within the braces. Then click the triggering box and select “All Pages” from the list. There may be circumstances when you don’t want the tag to fire on certain pages, like an employee login screen for example, but we won’t go into adding exceptions in this guide. Click save.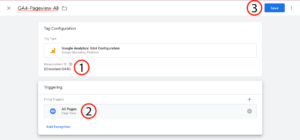
Step 5. Submit and publish your changes in Tag Manger to set them live. You should now see GA4 firing on your site. To check this, navigate to the “Realtime” section of your GA4 property and you should see your visit reflected once you go to the site after publishing the tags.
Now that you have basic GA4 tracking in place on your site, you can begin adding other tags like, form and click to call tracking, which we go over in other posts here. Happy tagging!